The best valentines are the homemade kind, but that doesn’t mean the art has to suffer. We asked Karron Nottingham at Off the Wall Studio for her suggestions on some do-it-yourself ideas for the holiday, and she delivered! Each of these is also available in a studio class around the holiday (materials included), or can be sourced at your local craft store (like Michael’s).
Upcycled Crayon Hearts
“These make a great valentine for kids to give to classmates (with a fun homemade coloring page as a card), or for grandparents to give to grandchildren,” Nottingham says. “They’re also great party favors and still work as crayons on the go.”
Materials:
• Recycled crayons
• Heart-shaped baking molds
Instructions:
- Remove paper from crayons, then break the crayons into small pieces.
- Loosely pack crayon bits into a silicone baking mold or mini muffin tin, grouping color families together (cool tones like green and blue; warm tones like orange and red). Fill just to the top. Do not overfill.
- Preheat oven to 225 degrees.
- Bake crayons for 15–20 minutes or until melted.
- Let crayons cool in molds for at least an hour for small shapes, overnight for larger shapes.
- Gently pop out hardened crayons from silicone molds. Turn muffin tins over and tap to remove crayons. Put molds into the freezer for a bit if you have trouble removing the crayons.
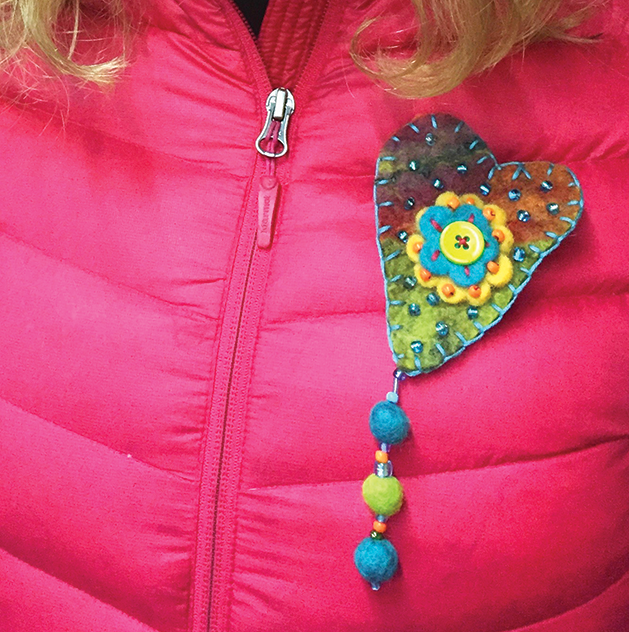
Embroidered, Felted and Beaded Heart Brooches
“These look great on jacket lapels or on hats,” Nottingham says.
Materials:
- Felt in various colors
- Buttons, assorted
- Embroidery thread and needle
- Beads in different shapes and sizes
- Stencils or cookie-cutters for shapes
- Hot glue
- Fabric scissors
- Optional: Safety pin
Instructions:
- Select a heart shape and a couple of other smaller shapes to layer on top of your heart brooch. Trace the outline on fabric, and cut two different colors of the heart and as many layers as you choose of other shapes (Nottingham recommends limiting to a total of four layers).
- With hot glue, affix the smaller shapes atop the primary heart. Consider adding a button or two for flare. If using a button, reinforce with stitching.
- Consider any beading you’d like to add to your primary heart shape. A tail with more buttons or beads can be added to the base of the heart.
- Stitch those in from the back of the primary heart prior to affixing it to the secondary heart with hot glue.
- Finish off the brooch with stitching around the perimeter of the final piece.
Optional: Attach a safety pin to the back of the heart for use as a brooch, or hang around your house for holiday décor.


